
This is the technical reference page that supports our service and location pages — the engineering detail that doesn't belong in a sales conversation but matters when you're writing a specification, evaluating a proposal, or investigating why an existing installation failed.
It is intentionally non-promotional. Use it to compare contractor proposals, draft RFPs, or hand to your engineer. For service offerings and pricing, see our main bollard installation page. For city-specific projects, see our Edmonton commercial bollard installation page and our Calgary commercial bollard installation page — Edmonton and Calgary are the two largest markets we serve. For approvals, locates, and the rules around permanent installations in the public right-of-way, see Do I need a permit to install bollards in Alberta?.


Soil & Substrate Engineering
The single biggest factor in bollard performance isn't the bollard itself — it's what's underneath it. A $400 bollard in engineered fill performs better than a $1,200 bollard in loose clay. Understanding your substrate is where every installation should start. For a broader overview of bollard types and applications, see our complete bollard type guide.
Soil Classification & Impact on Design
Granular soils (sand, gravel, engineered fill) provide excellent lateral resistance and drainage. Bollards installed in well-compacted granular bases require standard embedment depths and concrete volumes. These are the ideal conditions — common on newer industrial and warehouse sites built on engineered pads.
Cohesive soils (clay, silt) are the most common substrate across Central Alberta — and the most problematic. Clay expands when wet and contracts when dry, creating cyclical lateral pressure on bollard footings. In Edmonton's heavy clay zones, this expansion can exceed 3–5% volumetrically, generating enough force to crack undersized concrete footings within 2–3 freeze-thaw cycles.
Organic soils and fill present the worst conditions. If your site has been backfilled with uncompacted material, the bollard footing has nothing to push against during impact. We've seen bollards installed in loose fill lean 15° after a single low-speed parking lot bump. The fix is always the same: excavate to competent soil, compact in lifts, and pour your footing against undisturbed material.
Mixed or unknown substrates require test holes. On any commercial site where as-built drawings aren't available, the first step is always a test excavation at the proposed bollard locations. This is non-negotiable — guessing at soil conditions is how installations fail. A professional site security risk assessment identifies these conditions before work begins.
Water Table & Drainage
Standing water in a bollard hole during concrete placement is a common installation failure. Water weakens the concrete bond, creates voids in the footing, and accelerates corrosion at the bollard base. On sites with high water tables or poor drainage, installations should include a 6" gravel drainage layer beneath the concrete footing and, in severe cases, a perforated drain tile connected to the site's storm system.
Frost Heave: Alberta's #1 Installation Killer
If you install bollards in Alberta and don't account for frost, they will move. This isn't a maybe — it's physics.
How Frost Heave Destroys Bollards
Alberta's frost penetration depth ranges from 48" to 72" depending on location and winter severity. Edmonton's design frost depth is typically calculated at 60" (1.5m), while Calgary and Red Deer experience similar ranges. When soil moisture freezes, it forms ice lenses that expand upward, lifting everything above them — including bollard footings that don't extend below the frost line. According to the National Building Code of Canada, foundation depths must account for local frost penetration to prevent structural movement.
The result is predictable: bollards that were plumb in September are leaning 5–10° by March. Concrete collars crack. The surface restoration (asphalt or concrete) around the bollard fractures. Within 2–3 winters, the bollard is functionally compromised — a scenario we cover in detail in our article on bollard maintenance and repair lifecycles.
The Frost-Proof Solution
Standard embedment depth for Alberta installations: 42" to 48" minimum. This places the bottom of the concrete footing below the active frost zone in most of Central Alberta. For northern installations (Fort McMurray, Grande Prairie), depths of 54" to 60" may be required.
The footing itself matters as much as the depth. A bell-shaped footing — wider at the bottom than the top — resists uplift forces far better than a straight-sided pour. The wider base acts as an anchor against the upward pressure of frost heave, requiring significantly more force to dislodge.
Cold-Weather Installation Protocols
Concrete placed below 5°C requires modified procedures:
Key Facts
Heated water — in the concrete mix to maintain workable temperatures
Insulated blankets — over fresh pours, maintained for a minimum of 72 hours
Extended cure times — : standard 28-day strength development extends to 35–42 days in cold conditions
No installation below -20°C — : concrete will not hydrate properly regardless of admixtures
Load Calculations & Impact Ratings

Understanding what a bollard can actually stop — and what it can't — is critical for proper specification. Not all bollards are created equal, and the marketing language around "impact resistance" is often deliberately vague.
The Physics of Vehicle Impact
The force a bollard must withstand is a function of vehicle mass × velocity². This means speed matters exponentially more than weight:
- A 2,000 kg vehicle at 15 km/h generates approximately 17,361 joules of kinetic energy
- The same vehicle at 30 km/h generates approximately 69,444 joules — 4× the energy at just double the speed
- At 50 km/h, that number jumps to approximately 192,901 joules — requiring crash-rated (anti-ram) bollards
For most commercial parking lot applications, the design scenario is a vehicle traveling at 15–30 km/h — the speed range of a parking lot approach, an out-of-control acceleration, or a low-speed ram-raid attempt. Standard fixed bollards with proper embedment (42"–48") and concrete-filled steel construction handle this range effectively.
ASTM F2656 & PAS 68 Crash Ratings
For high-security applications, bollards are tested and rated under international standards:
ASTM F2656 (American standard) tests with a 6,800 kg (15,000 lb) vehicle at speeds from 30 to 80 km/h. Ratings are designated as M30, M40, M50 (speed in mph) with penetration ratings P1 (≤1m), P2 (1–7m), P3 (7–30m).
PAS 68 (British standard) uses similar methodology with varying vehicle classes. An IWA 14-1 rating is the newer international equivalent.
For 99% of commercial properties — retail, warehousing, daycares, parking lots — standard fixed bollards (non-crash-rated) provide more than adequate protection. Crash-rated bollards are engineered for government buildings, military installations, embassies, and high-value targets where deliberate high-speed vehicle attacks are a credible threat. They cost 3–10× more than standard commercial bollards. Ontario recently committed $20 million to bollard protection following high-profile vehicle-into-building incidents.
→Learn more about crash-rated bollard specifications
Installation Methods: Choosing the Right Approach
The installation method is dictated by three factors: substrate type, site access, and underground utilities. There is no universal "best" method — only the right method for your specific conditions.
Core Drilling
Best for: Existing concrete or asphalt surfaces where the substrate is known and utility-free.
Core drilling uses a diamond-tipped rotary drill to cut a clean cylindrical hole through the existing surface and into the substrate below. Typical hole diameters are 10"–14" for a standard 4"–6" OD bollard, providing adequate clearance for the concrete footing.
Advantages: Clean cuts, minimal surface disruption, fast execution (15–30 minutes per hole in concrete).
Limitations: Cannot be used when underground utilities are present within the drilling zone. Core drill bits are destroyed by hitting rebar or utility conduit, making this method expensive when surprises are encountered.
Hydrovac Excavation
Best for: Sites with known or suspected underground utilities, urban environments, or any location where utility damage risk exists.
Hydrovac uses pressurized hot water to break up soil and a vacuum system to extract the slurry, creating a clean excavation without any mechanical contact with underground infrastructure. This is the only method approved for digging near gas lines, fiber optic cables, and electrical conduit in most Canadian jurisdictions.
Advantages: Zero risk of utility damage, works in any soil type including frozen ground, clean excavation with precise dimensions.
Limitations: Requires specialized equipment (hydrovac truck), higher per-hole cost than core drilling, requires waste disposal for excavated material. Travel costs apply for remote sites.
→See our bollard installation process for a step-by-step overview
Auger / Mechanical Excavation
Best for: Greenfield sites (new construction), open areas with no utility conflicts, large-volume installations.
Traditional auger drilling or mechanical excavation (mini-excavator) is the fastest and most cost-effective method when site conditions allow. A standard 12" auger creates the footing hole in under 5 minutes in granular soil.
Limitations: Not suitable for sites with underground utilities. Cannot be used in existing concrete or asphalt without prior surface cutting. Risk of collateral damage to adjacent surfaces.
Hand Excavation
Best for: Extremely tight access, interior installations, or sites where no powered equipment can reach.
Manual excavation with hand tools is the slowest and most labour-intensive method, but sometimes it's the only option — particularly for interior warehouse bollards where equipment access is restricted, or for sites immediately adjacent to structures where vibration from powered equipment could cause damage.
Concrete Specifications
The concrete footing is the foundation of every bollard installation. Get it wrong and the bollard becomes a lever — amplifying impact forces directly into the substrate instead of absorbing them.
Mix Design
Standard bollard footings use 30 MPa (4,350 PSI) concrete — the same specification used for structural foundations and sidewalks in Alberta. This provides adequate compressive strength to resist impact loading and freeze-thaw cycling.
Concrete-filled bollards use the same mix poured directly into the steel pipe, creating a composite structure where the steel handles tension and the concrete handles compression. This dramatically increases the bollard's moment of inertia (resistance to bending).
Volume Calculations
For a standard 6" OD bollard with a 12" diameter footing hole at 42" depth:
- Footing volume: π × (6")² × 42" = ~4,750 cubic inches = ~0.078 m³
- Concrete required per bollard: approximately 0.08 m³ (including fill within the bollard pipe)
- For 10 bollards: approximately 0.8 m³ — typically delivered by concrete truck for consistency
Need an exact number for your job? Use our free Bollard Concrete Estimator to calculate cubic yards and bag counts based on your pipe size, footing depth, and quantity.
Hand-mixed concrete (bagged premix) is acceptable for small installations (1–3 bollards) but introduces variability in mix consistency and water ratio. For installations of 4+ bollards, truck-delivered concrete is strongly recommended for quality control and efficiency.
Cure Time Requirements
By the Numbers
Initial set: — 24–48 hours (bollard should not be subjected to any lateral load)
Working strength (75%): — 7 days
Design strength (100%): — 28 days
Cold weather adjustment: — Add 7–14 days to all timelines when ambient temperatures are below 10°C
Critical note: A bollard that has been hit before the concrete has reached design strength may appear undamaged but will have internal micro-fractures in the footing that compromise long-term performance. There is no way to inspect this without excavation.
Bollard Spacing: The Engineering Behind the Gaps

Spacing isn't arbitrary — it's engineered to match the threat profile while maintaining pedestrian accessibility.
Vehicle Wheelbase vs Gap Width
The fundamental principle: gaps between bollards must be narrower than the narrowest part of the vehicle you're trying to stop. For passenger vehicles, the critical dimension is the front axle track width:
- Compact cars: 1,400–1,500 mm (55"–59")
- Sedans/SUVs: 1,500–1,650 mm (59"–65")
- Pickup trucks: 1,600–1,750 mm (63"–69")
- Commercial vans: 1,700–1,900 mm (67"–75")
Standard commercial spacing: 1,200–1,500 mm (48"–60") centre-to-centre. This stops all passenger vehicles while allowing comfortable pedestrian passage, wheelchair access, and emergency stretcher access.
Accessibility Requirements
The Accessibility for Ontarians with Disabilities Act (AODA) and Alberta's Barrier-Free Design Guide require a minimum clear passage of 920 mm (36") for wheelchair access. When calculating bollard spacing, subtract the bollard diameter from the centre-to-centre measurement to get the clear gap:
- 1,200 mm c/c with 6" (152 mm) bollards = 1,048 mm clear ✓ (exceeds 920 mm minimum)
- 1,000 mm c/c with 6" bollards = 848 mm clear ✗ (below minimum — not accessible)
Coverage Calculations
To protect a 50-foot (15.2m) storefront with 1,200 mm (4') spacing:
- Linear coverage needed: 15,200 mm
- Bollards required: (15,200 ÷ 1,200) + 1 = ~14 bollards
- End bollards should be positioned within 300 mm (12") of the building corners or edges of the protected zone
Utility Locates: The Non-Negotiable First Step
In Alberta, Alberta One-Call (1-800-242-3447) provides mandatory utility locate services. Every bollard installation requires a locate request minimum 3 business days before any excavation begins. This is not optional — it's provincial law under the Alberta Pipeline Act and municipal bylaws.
What Gets Marked
Utility locates identify and mark the approximate horizontal position of:
At a Glance
Natural gas lines — (yellow markings)
Electrical conduit — (red markings)
Telecommunications / fiber optic — (orange markings)
Water mains — (blue markings)
Sanitary & storm sewers — (green markings)
What Happens When You Hit Something
Striking a gas line during bollard installation triggers an immediate site evacuation, emergency response, and a regulatory investigation. The installing contractor faces potential fines of $25,000–$100,000+ under Alberta's Pipeline Act, plus full liability for repair costs and any injuries. This is why hydrovac excavation is the default method for any site where utility conflicts are possible.
Private utilities (internal building services, parking lot lighting conduit, irrigation systems) are not covered by Alberta One-Call. These must be identified through as-built drawings, ground-penetrating radar (GPR), or careful hand-exposure before mechanical excavation.
→Learn about our site security risk assessment process
Surface Restoration
Every bollard installation creates a hole in an existing surface. How that surface is restored determines both the aesthetics and the long-term durability of the installation.
Asphalt Restoration
The excavated area around each bollard is restored with hot-mix asphalt, compacted in 2" lifts to match the existing surface grade. A clean, tight seal between the asphalt and the bollard pipe prevents water infiltration — the primary cause of premature footing failure in asphalt-surface installations.
Concrete Restoration
Concrete surface restoration requires saw-cutting a clean edge around the excavation (minimum 2" beyond the footing hole), removing the disturbed concrete, and pouring a new section that matches the existing slab thickness and finish. Expansion joint material is placed between the new pour and the existing slab to accommodate thermal movement.
Turf / Landscape Restoration
For bollards installed in landscaped areas, the surface is restored with topsoil and sod or seed. A collar ring (steel or concrete) at the surface provides a clean finished edge and prevents grass from growing against the bollard pipe, which traps moisture and accelerates corrosion. Proper surface restoration is part of our standard line painting and surface marking services.
Common Failure Modes: What Goes Wrong

Understanding how bollard installations fail helps you evaluate contractor proposals and spot substandard work before it becomes a liability. The Richmond Hill daycare crash is a tragic example of what happens when protection isn't in place.
1. Insufficient Embedment Depth
Symptom: Bollard leans or pivots on impact instead of stopping the vehicle.
Cause: Footing doesn't extend below the frost line (Alberta: 42"–48" minimum) or below the point of lateral soil resistance. The bollard acts as a lever, with the fulcrum at the surface and the soil providing inadequate resistance.
Prevention: Verify depth specification in the contractor's proposal. Request photo documentation of hole depth before concrete placement.
2. Poor Concrete Consolidation
Symptom: Bollard loosens over time, wobbles when pushed by hand, or shifts under minor impact.
Cause: Air voids in the concrete footing from inadequate vibration or consolidation during pour. Voids reduce the effective contact area between concrete and soil, and between concrete and steel.
Prevention: Concrete should be rodded or vibrated during placement. For critical installations, request a vibrator be used for the footing pour.
3. Frost Heave
Symptom: Bollards rise out of the ground over successive winters, concrete collar cracks, surface restoration fails.
Cause: Footing is within the active frost zone. Ice lenses form beneath the footing and lift it incrementally each freeze-thaw cycle.
Prevention: Extend footing below the design frost depth. Use bell-shaped footings to resist uplift.
4. Corrosion at Grade
Symptom: Rust staining at the base of the bollard, thinning of the steel wall at the surface line, eventual structural compromise.
Cause: The point where the bollard meets the surface traps moisture, salt, and debris — creating a persistent corrosion cell. This is the most vulnerable point on any bollard.
Prevention: Galvanized steel specification (G90 or better), proper surface collar detailing, and powder coat or paint over the galvanized surface for double protection. The first 6" above and below grade should receive the most attention during any maintenance inspection. Learn more about the long-term implications of corrosion in our article on bollard liability and legal requirements.
5. Spacing Errors
Symptom: Vehicle passes between bollards despite the installation appearing adequate.
Cause: Centre-to-centre spacing exceeds the track width of common vehicles, or end bollards are too far from the building, allowing vehicles to pass around the end of the line.
Prevention: Design spacing based on vehicle track widths (see Spacing section above), and extend the bollard line to within 300 mm of building corners.
Material Specifications
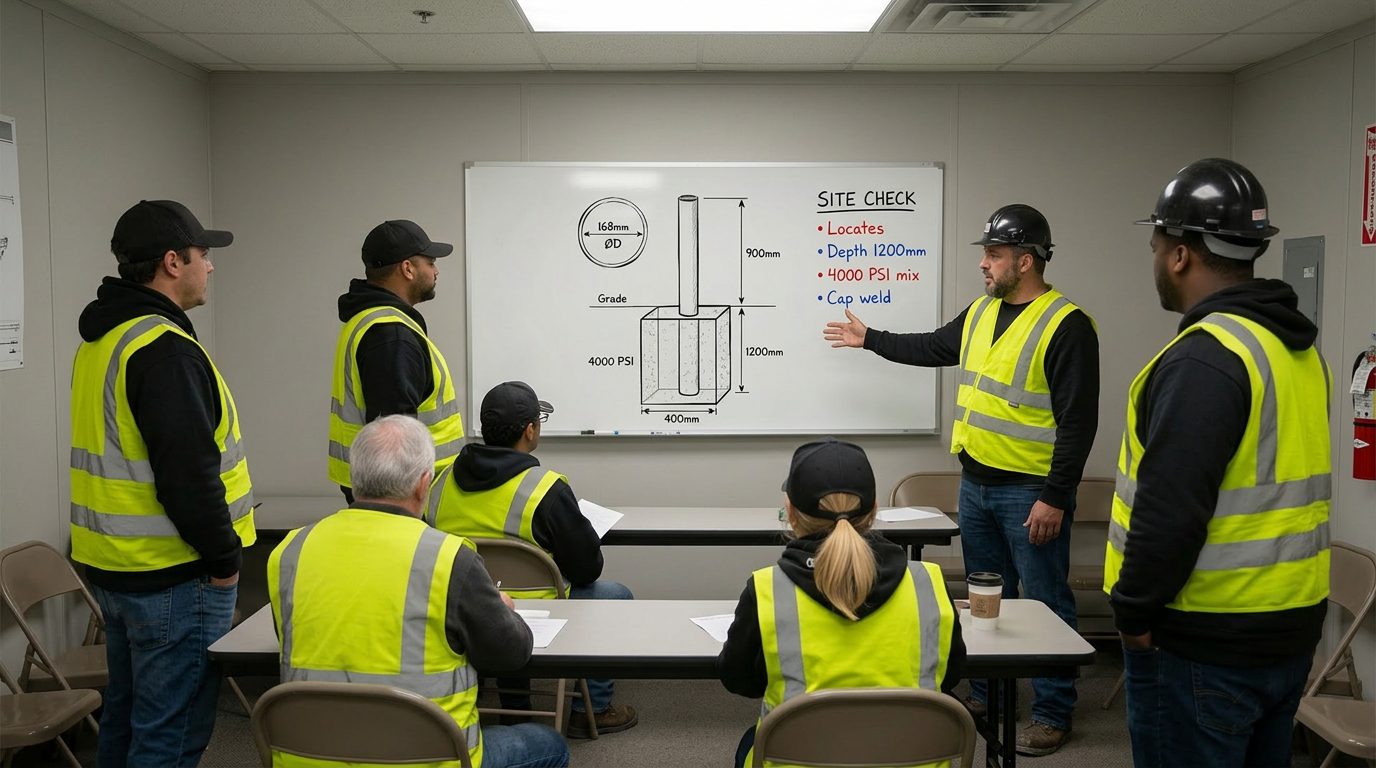
Steel Standards
Schedule 40 steel pipe is the standard for commercial bollard installations:
| Nominal Size | Outside Diameter | Wall Thickness | Weight per Foot |
|---|---|---|---|
| 4" NPS | 4.500" (114.3 mm) | 0.237" (6.02 mm) | 10.79 lb |
| 6" NPS | 6.625" (168.3 mm) | 0.280" (7.11 mm) | 18.97 lb |
| 8" NPS | 8.625" (219.1 mm) | 0.322" (8.18 mm) | 28.55 lb |
Schedule 80 provides thicker walls for higher-impact applications:
| Nominal Size | Outside Diameter | Wall Thickness | Weight per Foot |
|---|---|---|---|
| 4" NPS | 4.500" | 0.337" (8.56 mm) | 14.98 lb |
| 6" NPS | 6.625" | 0.432" (10.97 mm) | 28.57 lb |
| 8" NPS | 8.625" | 0.500" (12.70 mm) | 43.39 lb |
6" NPS Schedule 40 is the most commonly specified size for commercial installations — it provides an excellent balance of stopping power, visibility, and cost. For a detailed cost breakdown by bollard size and installation complexity, see our bollard installation cost guide. All work follows our documented safety & compliance standards, and steel pipe specifications follow ASTM A53 standards for structural pipe applications.
Protective Coatings
- 1Hot-dip galvanizing (G90): The base corrosion protection layer. Provides zinc sacrificial protection that actively prevents rust even when scratched. Expected service life: 25–50 years depending on environment.
- 1Powder coat: Applied over galvanized steel for colour (safety yellow being the standard). Provides UV protection for the zinc layer and visual identification. Expected service life: 10–15 years before requiring recoating.
- 1Safety yellow paint: The most common finish. Applied over galvanized steel, it requires recoating every 3–5 years depending on exposure and traffic.
→Read about bollard maintenance and lifecycle
Why Professional Installation Matters
The gap between a properly installed bollard and a poorly installed one isn't visible from the surface. Both look identical on day one. The difference shows up when:
- A vehicle hits the bollard and it stops the vehicle vs folds over
- Winter arrives and the bollard stays plumb vs heaves 4 inches
- An insurance adjuster evaluates your property and finds compliant installations vs decorative pipe in shallow concrete — a distinction that directly impacts insurance premiums and coverage
- A lawsuit follows an incident and your installation is evaluated against engineering standards — see our analysis of bollard liability and legal exposure
Professional installation means:
Quick Stats
Utility locates — before any excavation
Soil assessment — to determine the right method and depth
Engineered spacing — based on the actual threat profile
Quality concrete — at the right volume, properly consolidated
Photo documentation — of every phase (hole depth, footing pour, finished installation)
Warranty coverage — backed by a contractor who carries proper liability insurance
→Compare bollard types: Fixed vs Removable vs Surface-Mounted
Request Technical Specifications
We maintain detailed technical specification packages including:
The Bottom Line
Cut sheets — for all standard bollard sizes (4", 6", 8")
Embedment diagrams — with dimensions for Alberta frost depths
Concrete volume calculators — for project estimation
Spacing templates — for common commercial configurations
Material safety data sheets — for coatings and finishes
These documents are available to engineers, facility managers, and property owners evaluating bollard installations for their sites.
Request our technical spec package →
Get Expert Guidance for Your Project
Whether you're spec'ing a new installation, replacing failed bollards, or need a professional assessment of your property's protection gaps — Titan Barriers provides free on-site consultations across Edmonton, Calgary, Red Deer, and Lethbridge.
We'll walk your site, assess soil conditions, identify utility conflicts, and provide engineered spacing recommendations — all before you spend a dollar.
Request your free site assessment →
Frequently Asked Questions
How deep should bollards be installed in Alberta?
Standard bollard installations in Alberta require 42 to 48 inches of embedment depth to account for the province's frost penetration, which ranges from 48 to 72 inches depending on location. Footings must extend below the active frost zone to prevent frost heave — the #1 cause of bollard failure in Alberta. Northern locations like Fort McMurray may require depths of 54–60 inches.
What type of concrete is used for bollard footings?
Commercial bollard footings use 30 MPa (4,350 PSI) concrete — the same specification used for structural foundations. This provides adequate compressive strength to resist both vehicle impact loading and Alberta's aggressive freeze-thaw cycling. Concrete reaches full design strength after 28 days (35–42 days in cold weather).
How far apart should bollards be spaced?
Standard commercial spacing is 1,200 to 1,500 mm (48–60 inches) centre-to-centre. This stops all passenger vehicles while maintaining wheelchair accessibility (minimum 920 mm clear gap). Spacing should be based on the track width of vehicles in the threat profile — compact cars at 1,400 mm up to commercial vans at 1,900 mm.
Do I need crash-rated bollards for my commercial property?
For 99% of commercial properties — retail, daycares, parking lots, warehouses — standard fixed bollards provide more than adequate protection. Crash-rated bollards (ASTM F2656) are engineered for government buildings, military installations, and high-value targets where deliberate high-speed vehicle attacks are a credible threat. They cost 3–10× more than standard bollards.
How much does bollard installation cost in Alberta?
Bollard installation in Alberta typically costs $400 to $1,250+ per unit, fully installed. Standard concrete-filled steel bollards run $600–$900 per unit, while crash-rated bollards range from $1,500–$3,500+. See our complete bollard cost guide for detailed breakdowns by project type and size.
Can bollards be installed in winter in Alberta?
Yes, but cold-weather protocols are required. Concrete placed below 5°C needs heated water, insulated blankets for a minimum of 72 hours, and extended cure times (35–42 days vs standard 28). No installation should occur below -20°C as concrete will not hydrate properly regardless of admixtures.
What happens if you hit a utility line during bollard installation?
Striking a gas line triggers an immediate site evacuation and regulatory investigation. Fines range from $25,000 to $100,000+ under Alberta's Pipeline Act. This is why Alberta One-Call utility locates are mandatory before any excavation, and why hydrovac excavation is the default method near known or suspected utilities.
How long do commercial bollards last?
With proper installation and materials (hot-dip galvanized steel, powder coat finish, footings below frost line), commercial bollards have a service life of 25–50 years. The powder coat may require recoating every 10–15 years, and safety yellow paint needs refreshing every 3–5 years. See our guide on bollard maintenance lifecycles.
Titan Barriers provides professional bollard installation, warehouse barrier systems, hostile vehicle mitigation, and site security assessments for commercial and industrial properties across Alberta. Contact us today for a free estimate.
Contact UsFree Tool · 60 Seconds
Not sure how many bollards you need for a project like this?
Try our free Bollard Calculator — answer 6 quick questions and get a tailored recommendation: bollard count, diameter, spacing, foundation, finish, and excavation method. Built for Alberta commercial sites.
Sources
ASTM International
Alberta One-Call
Government of Alberta
British Standards Institution
International Organization for Standardization
Government of Ontario
National Research Council Canada
Portland Cement Association
Storefront Safety Council


